
Editing videos on a Mac used to feel like a weird fork in the road. Either you stayed inside beginner tools forever, or you jumped straight into professional editing software with timelines that looked like airplane control panels.
That’s changed a lot.
Today, Mac video editing is far more creator-friendly than it used to be, especially if you combine simple editing basics with newer AI-powered tools that handle the repetitive parts for you. You no longer need to spend weeks learning advanced editing techniques just to make a clean YouTube video, TikTok, product demo, tutorial, or Instagram Reel.
In fact, most creators do not actually need Hollywood-level editing software. They need a workflow that helps them:
- organize footage quickly
- trim videos without frustration
- add captions fast
- resize content for different platforms
- clean up audio
- create social-ready edits
- export videos without ruining quality
That’s where modern tools, online editors, and AI-assisted workflows start making a huge difference.
In this guide, we’ll walk through how to edit videos on Mac in a way that feels practical for real creators, marketers, educators, founders, and small teams. We’ll cover beginner-friendly editing workflows, the best tools to use, where AI can genuinely save time, and how platforms like Async can help speed up the process without replacing your creative decisions.
So let’s get straight into it!
How to edit videos on Mac
Editing videos on a Mac becomes much easier when you follow a simple workflow instead of trying to learn every editing feature at once. Most beginners only need a clean process: organize clips, make a rough cut, improve audio, add captions or text, resize for the platform, and export the final video.
1. Start with a clear goal for the video
Before importing footage into any video editor for Mac, decide where the video is going.
A YouTube tutorial, TikTok, Instagram Reel, product demo, and marketing video all need different pacing, dimensions, and editing styles. This sounds obvious, but it saves beginners from making one giant edit and then trying to force it into every platform later.
A simple rule:
- YouTube = longer pacing, horizontal format
- TikTok/Reels/Shorts = faster cuts, vertical format
- Product videos = cleaner structure and captions
- Tutorials = strong audio and readable text
Knowing the final platform early makes the rest of the editing process much easier.
2. Import and organize your footage first
One of the biggest beginner mistakes in Mac video editing is throwing random clips into a timeline immediately.
Instead:
- create folders for footage, music, voiceovers, and exports
- rename important clips if needed
- delete obviously bad takes early
- separate “must-use” clips from backup footage
Even five minutes of organization makes editing dramatically less stressful later.
If you are editing videos on a MacBook Air or working with limited storage, keeping projects organized also helps your system run more smoothly.
3. Make a rough cut before adding effects
The rough cut is where you remove the obvious bad parts and build the structure of the video.
Do not worry about transitions, captions, zoom effects, or animations yet. Focus only on:
- trimming awkward pauses
- removing mistakes
- arranging clips in the right order
- keeping the pacing clean
A lot of beginners waste time polishing sections that eventually get deleted anyway. Getting the structure right first speeds everything up.
If you’re learning how to edit videos on Mac for beginners, this single habit probably saves the most time.
4. Fix audio before visuals
People will forgive average video quality much faster than bad audio.
Before adding fancy effects:
- reduce background noise
- balance volume levels
- remove distracting silence
- clean up microphone inconsistencies
This is also where AI tools can genuinely help. Many modern editors can automatically enhance speech, reduce noise, or clean recordings without requiring advanced audio skills.
For talking-head videos, podcasts, tutorials, or social content, better audio instantly makes the content feel more professional.
5. Add captions, text, and visual polish
Once the structure feels solid, you can start polishing the video.
This usually includes:
- captions
- titles
- text overlays
- basic transitions
- zooms or reframing
- music
- brand colors or logos
For short-form content, especially, captions matter a lot. Many viewers watch social videos muted first, especially on TikTok, Instagram Reels, and LinkedIn.
Instead of manually typing subtitles line by line, many creators now use AI caption tools to generate and sync captions automatically, then review and clean them up afterward.
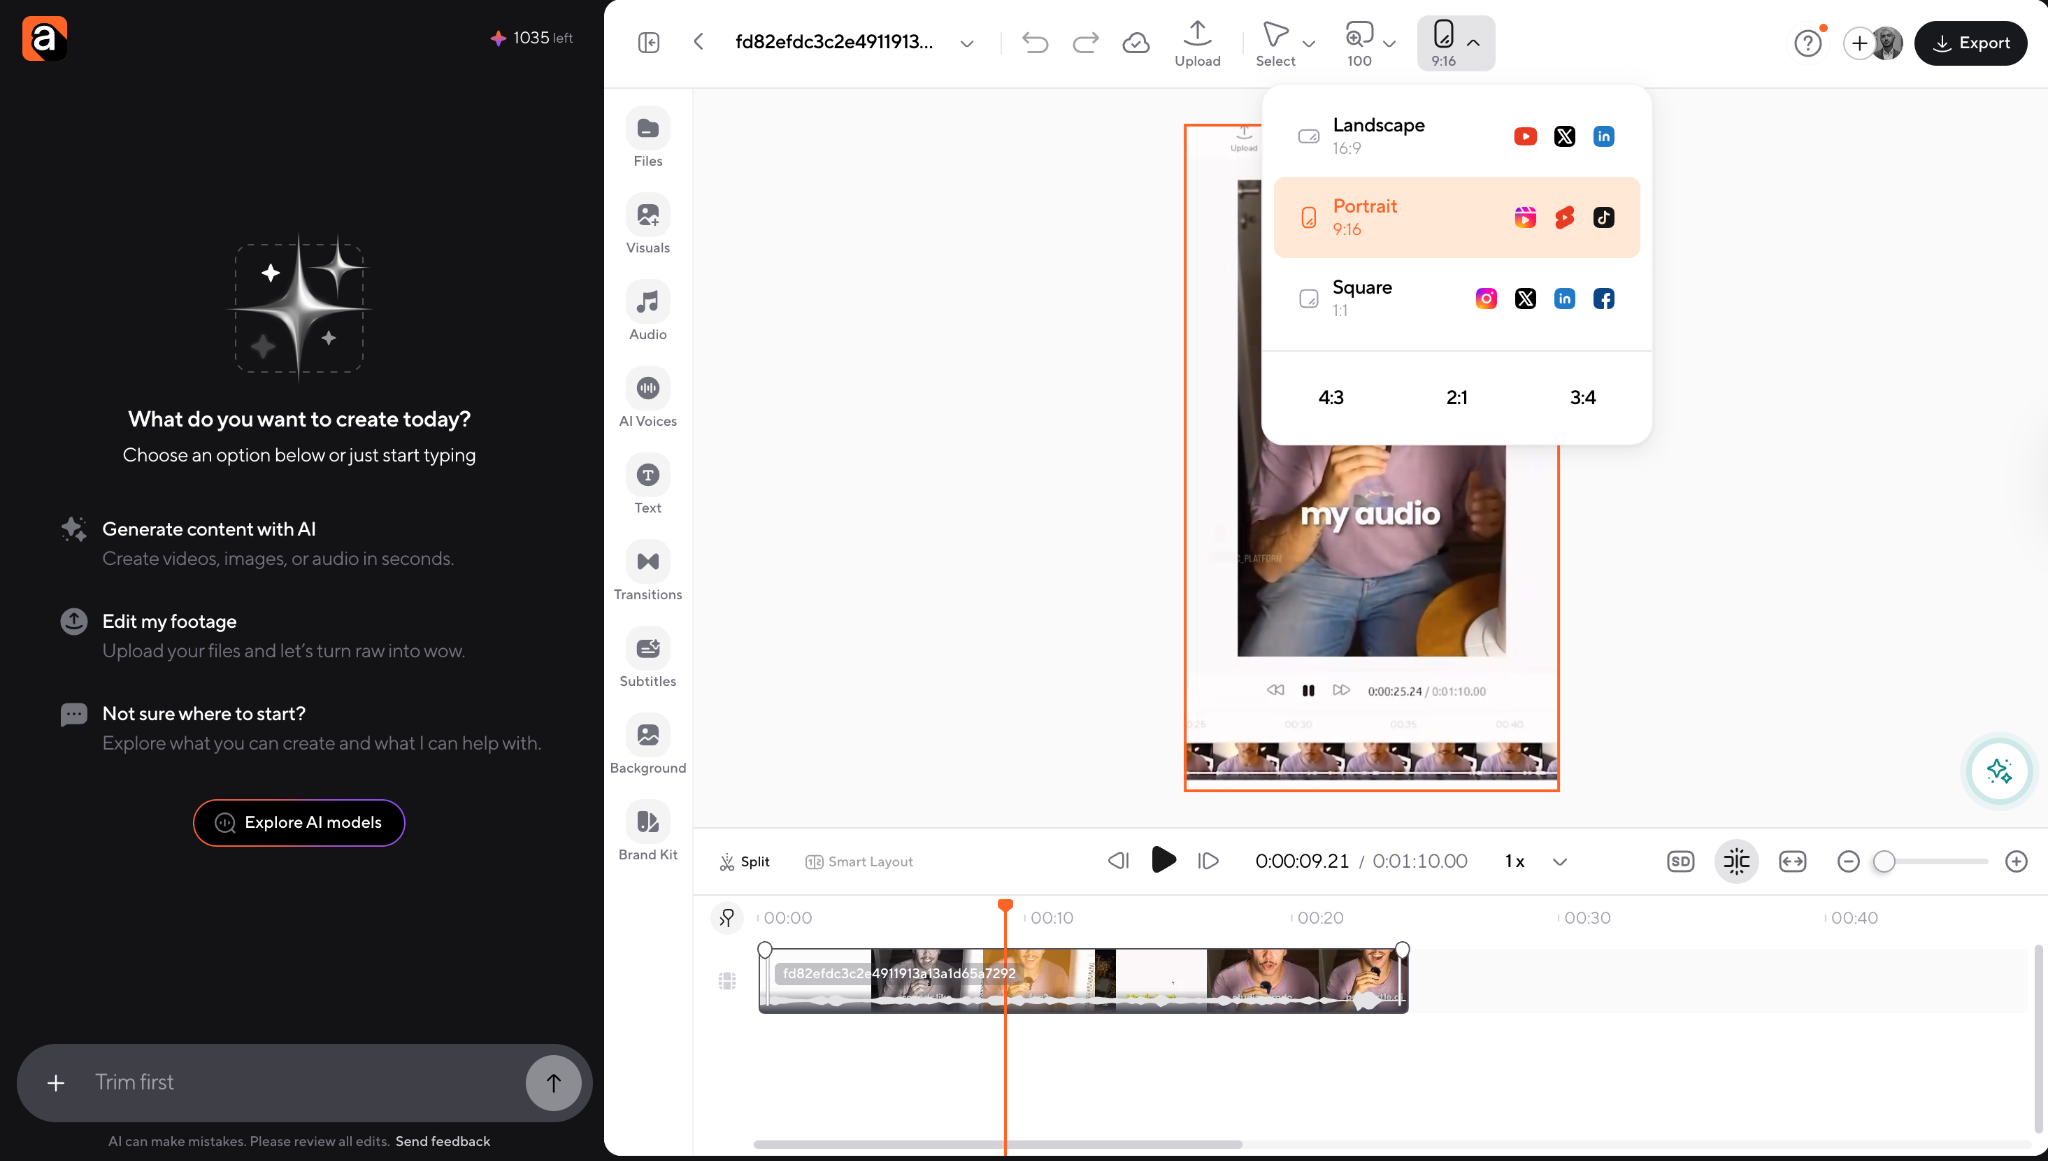
6. Resize and optimize for the platform
A video that looks great on YouTube may look terrible on TikTok if you export it incorrectly.
Before exporting, check:
- aspect ratio
- resolution
- caption placement
- text size
- safe zones for mobile apps
For example:
- YouTube usually works best in 16:9
- TikTok/Reels/Shorts use 9:16 vertical video
- Square formats still work well for some LinkedIn and Instagram posts
Modern online video editors for Mac often make this easier with one-click resizing and social presets.
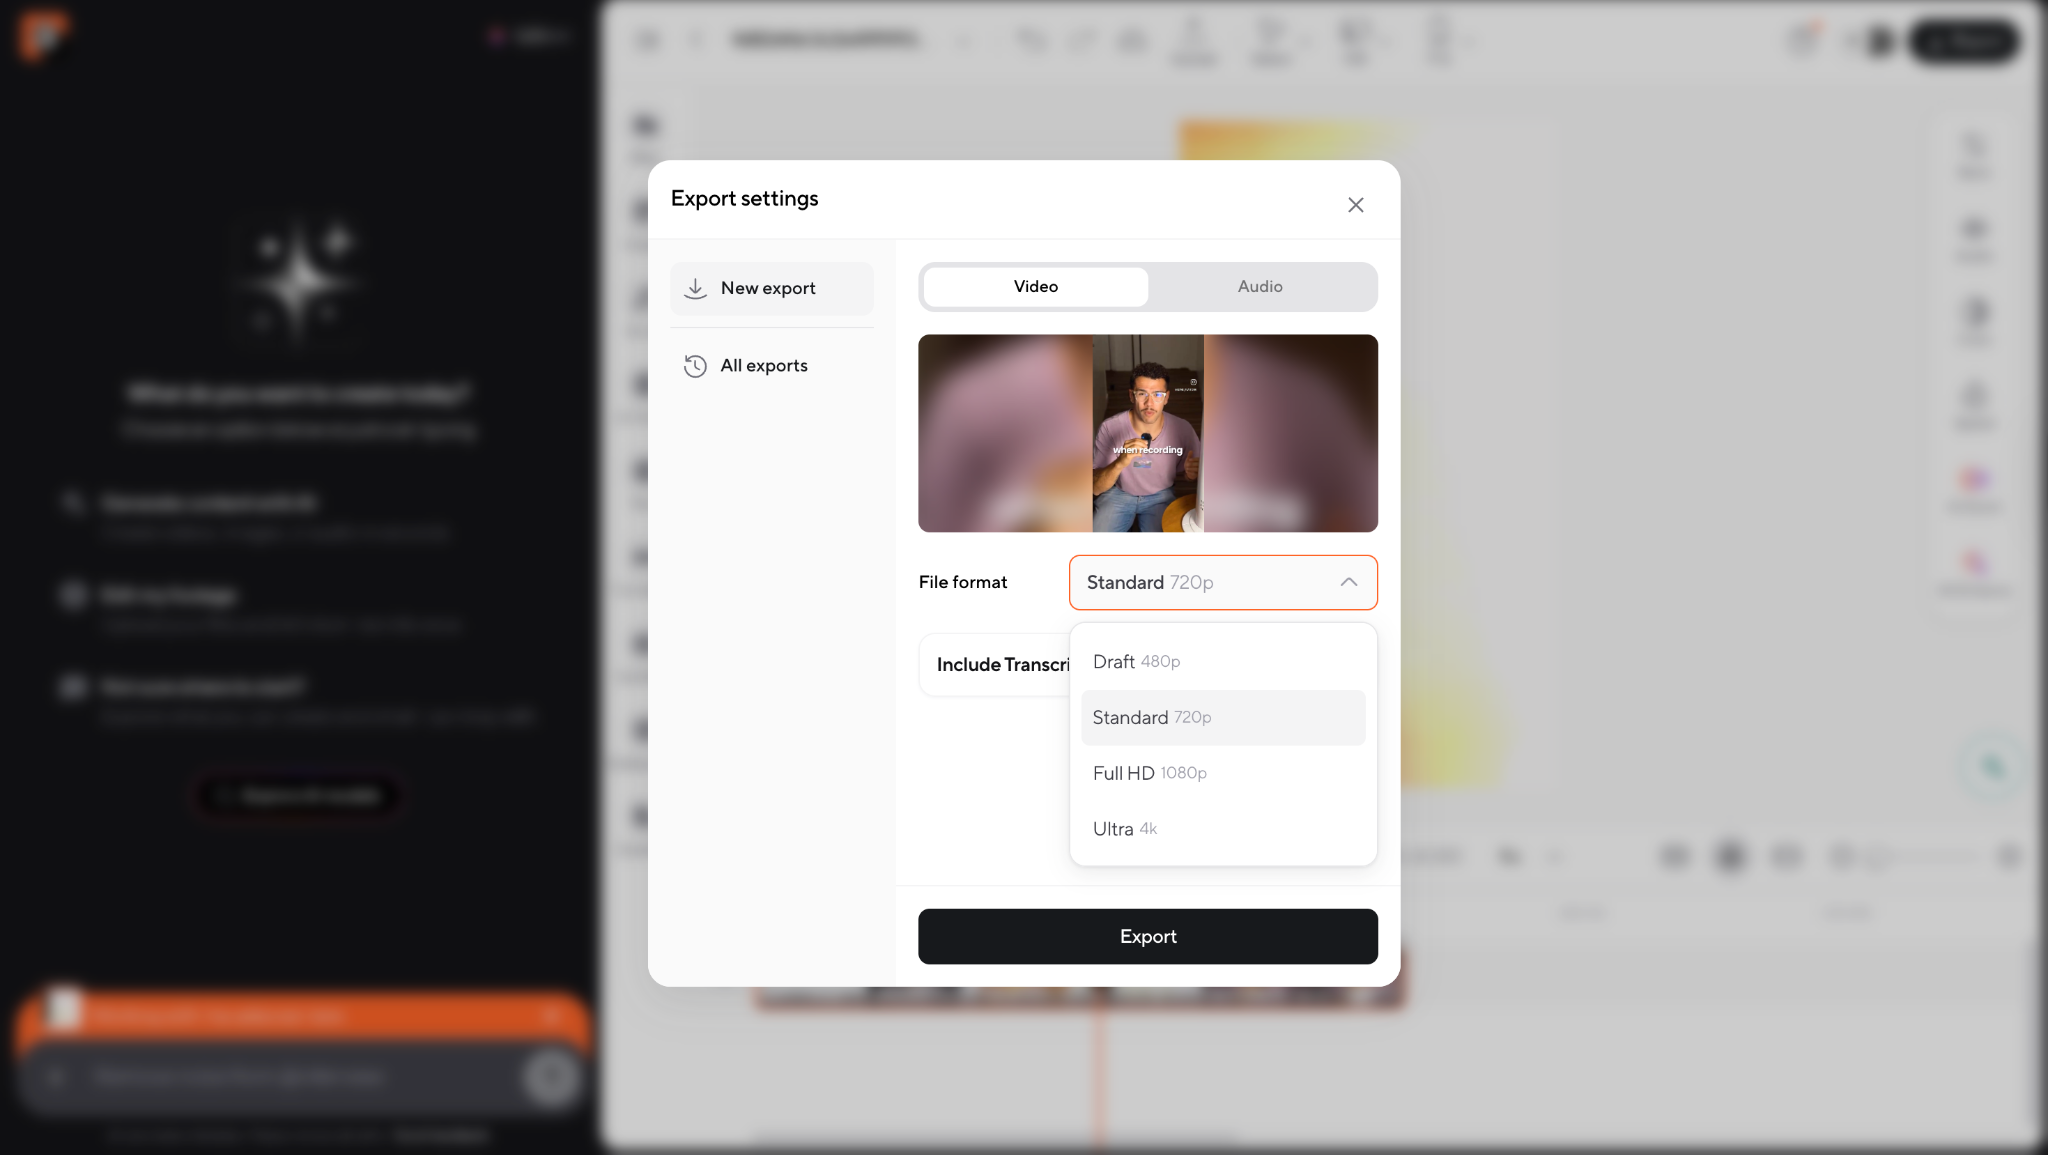
7. Export the final version
Once everything looks good, export the video in the correct format and resolution for the platform you care about.
Most beginners do not need complicated export settings. In most cases:
- MP4 works perfectly
- 1080p is enough
- H.264 is the safest format
- vertical exports should stay optimized for mobile viewing
The important part is reviewing the export before posting. Watch the final version once with sound and once without sound to catch caption mistakes, audio jumps, or formatting issues.
The best video editor for Mac beginners depends less on “which tool is the most powerful” and more on how you actually create content. Some Mac video editing tools are better for fast social workflows, while others are built for professional filmmaking, color grading, or advanced production work.
If you want the short version:
- Async is best for AI-assisted online video editing and faster creator workflows
- iMovie is the easiest free video editor for Mac
- CapCut is strong for short-form social content
- Canva works well for lightweight marketing videos
- Final Cut Pro is ideal for serious Mac-based editing
- DaVinci Resolve is best for advanced color and professional workflows
- Adobe Premiere Pro is popular for teams already inside Adobe’s ecosystem
If you want a deeper comparison of Mac video editing software, you can also check out our full guide to video editing software for Mac.
Async
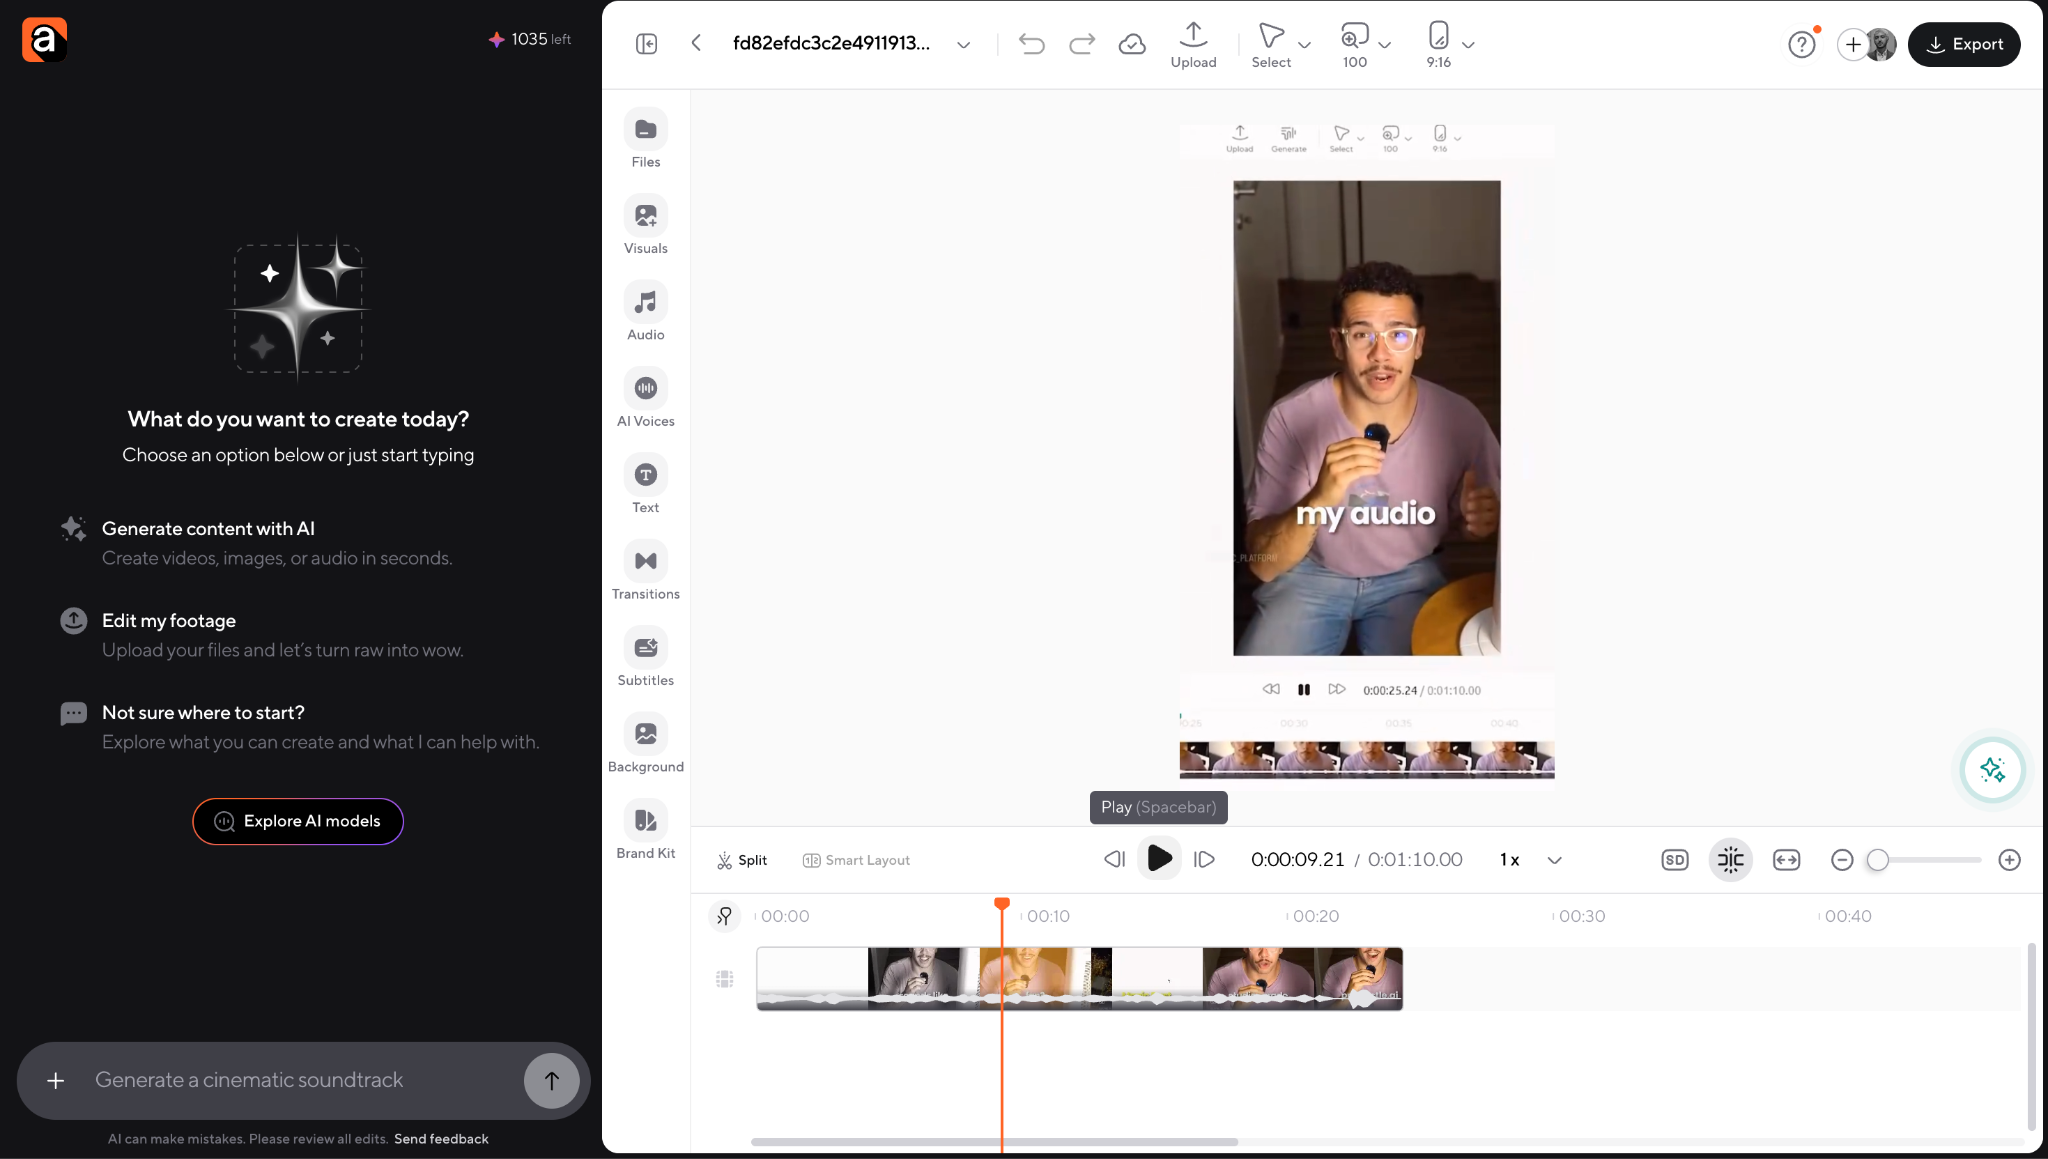
Async is one of the easiest ways to edit videos on Mac if you want a faster, more modern workflow without downloading heavy desktop software.
Because it runs in the browser, you can open it directly on your MacBook and start editing immediately. The platform focuses heavily on AI-assisted workflows, which makes it especially useful for creators, marketers, educators, founders, and small teams producing social or marketing content regularly.
Instead of spending hours manually editing every detail, Async can help speed up parts of the workflow, like:
What makes Async particularly beginner-friendly is that it removes a lot of the technical friction that scares new editors away from traditional software.
At the same time, it still gives creators room to review, polish, and control the final creative decisions instead of letting AI fully take over the process.
iMovie
iMovie is still the default recommendation for beginners learning how to edit videos on Mac for the first time.
The biggest advantage is simplicity. Most Mac users already have access to it, and the interface is much less intimidating than professional editing software.
It works especially well for:
- school projects
- simple YouTube videos
- basic tutorials
- family videos
- lightweight editing
The downside is that many creators outgrow it fairly quickly. Once you start needing advanced captions, AI workflows, content repurposing, or platform-specific editing, iMovie can start feeling limited.
Still, as a free video editor for Mac, it remains one of the best starting points available.
CapCut
CapCut became popular for a reason: it makes short-form editing extremely fast.
For TikTok creators, Reels editors, and YouTube Shorts creators, CapCut simplifies things like:
- vertical editing
- templates
- captions
- auto-syncing music
- quick transitions
- social-friendly exports
The learning curve is low, which makes it appealing for beginners.
That said, some creators eventually want more flexibility, stronger organization tools, or workflows that feel less template-driven. CapCut is excellent for speed, but not always ideal for larger or more complex editing projects.
Canva
Canva is surprisingly useful for lightweight video editing on Mac, especially for marketers, educators, founders, and small businesses.
It works best for:
- presentation-style videos
- product explainers
- social ads
- animated text videos
- simple branded content
The drag-and-drop workflow is very beginner-friendly, and it helps non-editors create decent-looking content quickly.
However, Canva is not really designed for deeper video storytelling or heavier editing workflows. Once projects become more cinematic, multi-layered, or editing-intensive, most creators move to more dedicated video editing tools.
Final Cut Pro
Final Cut Pro is one of the most optimized professional editing tools for Mac users.
Because Apple built it specifically for macOS, performance is usually excellent, especially on newer MacBooks and Apple Silicon devices.
Final Cut Pro is ideal for creators who:
- edit frequently
- work with larger projects
- want advanced control
- need faster rendering
- create professional YouTube or commercial content
The downside for beginners is the learning curve. It is far more approachable than some professional editors, but still much more advanced than tools like Async, iMovie, or Canva.
For many creators, Final Cut Pro becomes the “next step” after outgrowing beginner-friendly software.
DaVinci Resolve
DaVinci Resolve is incredibly powerful, especially for color grading and professional post-production.
A lot of advanced editors love it because it combines:
- editing
- color correction
- audio production
- visual effects
- motion graphics
The free version is also surprisingly generous.
But for complete beginners learning Mac video editing, Resolve can feel overwhelming very quickly. The interface is built for serious production workflows, not lightweight content creation.
It is best for creators who already know they want to go deeper into professional editing.
Adobe Premiere Pro
Premiere Pro remains one of the most widely used editing tools in professional content production.
It integrates well with the larger Adobe ecosystem, which is helpful for teams using Photoshop, After Effects, or Adobe Audition.
Premiere is flexible and powerful, but it is not always the easiest place for beginners to start.
Many creators learning how to edit a video on Mac eventually realize that they spend more time managing the software itself than actually creating content. That’s one reason lighter AI-assisted workflows and online video editors for Mac have become more popular recently.
How AI can help you edit videos on Mac
AI is making video editing on Mac much faster, especially for creators publishing content regularly. Instead of replacing editors completely, AI tools help automate repetitive tasks like captions, resizing, cleanup, voiceovers, and repurposing so creators can focus more on storytelling and creative decisions.
A few years ago, editing videos on Mac often meant doing almost everything manually. Now, AI-powered workflows can help speed up:
- captions and subtitles
- resizing for different platforms
- audio cleanup
- voiceovers
- script assistance
- repurposing long videos into shorter clips
The important thing is that AI still works best as an assistant, not a replacement for human creativity.
AI captions and subtitles
Captions are one of the biggest time-saving features in modern video editing workflows.
Instead of typing subtitles manually, AI tools can automatically:
- transcribe speech
- sync captions
- generate subtitle styles
- speed up short-form editing
This is especially useful for TikTok, Reels, Shorts, tutorials, interviews, and marketing videos where many viewers watch without sound first.
AI resizing and repurposing
One video rarely works perfectly across every platform.
AI tools can help:
- resize videos for TikTok, Reels, and YouTube
- reframe subjects automatically
- create shorter clips from long videos
- adapt horizontal videos into vertical formats
This makes content repurposing much faster for creators working across multiple platforms.
AI cleanup and editing assistance
AI can also speed up repetitive editing tasks like:
- removing filler words
- trimming silence
- reducing background noise
- improving audio clarity
- identifying highlight moments
This is where tools like Async fit naturally into Mac video editing workflows.
Instead of forcing beginners to learn advanced editing software immediately, Async helps creators move from raw footage to social-ready content faster while still keeping creative control in human hands.
A quick example of an AI-assisted workflow on Mac
Here’s a simple workflow we tested using Async on a MacBook:
- Opened Async directly in the browser.
2. Uploaded a short talking-head clip.
3. Generated AI captions automatically.
4. Cleaned audio and removed awkward pauses.
5. Resized the video for TikTok and Reels.
6. Exported a social-ready version in minutes.
The best social media editing workflow on Mac is usually the simplest one. Most creators are not trying to build perfect cinematic edits every time. They are building repeatable workflows that help them create, edit, resize, and publish content consistently.
Start with one core piece of content
Instead of creating separate videos for every platform, start with one main piece of content:
- podcast episode
- tutorial
- interview
- product demo
- talking-head video
Then repurpose it into shorter clips for TikTok, Reels, Shorts, or LinkedIn.
This is where AI-assisted workflows save a huge amount of time.
Edit for retention, not perfection
Social videos usually perform better when they are:
- faster-paced
- easier to follow
- caption-friendly
- visually clear
A lot of beginners over-edit with too many effects and transitions when simpler edits often work better.
Build reusable templates
Reusable workflows make editing dramatically faster.
This can include:
- caption styles
- intro layouts
- text animations
- brand colors
- export presets
Once those are consistent, every new edit becomes easier.
Use AI for repetitive tasks
AI tools work best when they handle the repetitive production work:
- captions
- resizing
- transcript generation
- silence removal
- clip generation
For creators posting regularly, this can save hours every week.
Publish before everything feels perfect
One of the biggest mistakes beginners make is waiting too long to post.
Your first videos do not need to look perfect. Consistency and repetition improve editing skills much faster than endlessly tweaking drafts nobody sees.
Common mistakes beginners make when editing videos on Mac
Most beginner editing mistakes come from trying to do too much too early. In most cases, cleaner workflows and simpler edits lead to better-looking videos.
- Ignoring audio quality and focusing only on visuals
- Using too many transitions, zooms, and effects
- Exporting videos in the wrong aspect ratio for the platform
- Making captions too small or difficult to read on mobile
- Relying too heavily on AI without reviewing the final edit
- Starting with advanced editing software too early
- Adding unnecessary music or sound effects everywhere
- Editing before organizing footage properly
- Over-editing social videos instead of focusing on pacing
- Spending too long polishing videos instead of publishing consistently
The best editing workflows are usually the simplest ones: clean audio, readable captions, clear pacing, and platform-friendly formatting.
Your Mac is more ready for video editing than you think
You do not need complicated software or professional editing skills to start creating good videos on a Mac.
Most creators improve by building simple workflows, posting consistently, and learning as they go. Clean cuts, readable captions, strong audio, and platform-friendly formatting matter far more than flashy effects.
And with AI-powered tools helping with captions, resizing, cleanup, and repurposing, editing videos on Mac has become much faster and more beginner-friendly than it used to be.
The important part is simple: start creating and keep publishing
FAQ questions
What is the easiest way to edit videos on a Mac?
The easiest way is to follow a simple workflow: organize footage, make a rough cut, clean the audio, add captions, and export for your platform. Beginner-friendly tools like iMovie, CapCut, or Async help simplify the process significantly.
What is the best video editor for Mac beginners?
iMovie is usually the easiest free starting point for Mac users. But if you want AI-powered features like captions, resizing, and faster social workflows, tools like Async are often more flexible for modern content creation.
Can I edit videos on a Mac for free?
Yes. iMovie comes free on most Macs, and tools like DaVinci Resolve also offer free versions. Some online video editors for Mac include free plans with limited exports or AI features.
How do I edit videos on a MacBook Air?
MacBook Air devices handle lightweight and medium video editing surprisingly well. Browser-based editors and AI-powered workflows can also reduce system strain compared to heavier professional editing software.
How do I edit videos on a MacBook Pro?
MacBook Pro models are great for video editing, especially for larger projects or professional workflows. They work well with advanced tools like Final Cut Pro, DaVinci Resolve, Premiere Pro, and AI-assisted editing platforms.
Can I use AI to edit videos on a Mac?
Yes. AI tools can help generate captions, resize videos, clean audio, create voiceovers, remove silence, and speed up editing workflows. Most creators still review and polish the final edit manually.
Is iMovie good enough for video editing on Mac?
For many beginners, yes. iMovie is simple, free, and easy to learn. But creators often outgrow it once they need AI tools, advanced captions, faster repurposing workflows, or more professional editing control.
How do I export videos from Mac for Instagram, TikTok, or YouTube?
Always export based on the platform. Use 16:9 horizontal video for YouTube and 9:16 vertical video for TikTok, Reels, and Shorts. MP4 and 1080p usually work well for most platforms.
PakarPBN
A Private Blog Network (PBN) is a collection of websites that are controlled by a single individual or organization and used primarily to build backlinks to a “money site” in order to influence its ranking in search engines such as Google. The core idea behind a PBN is based on the importance of backlinks in Google’s ranking algorithm. Since Google views backlinks as signals of authority and trust, some website owners attempt to artificially create these signals through a controlled network of sites.
In a typical PBN setup, the owner acquires expired or aged domains that already have existing authority, backlinks, and history. These domains are rebuilt with new content and hosted separately, often using different IP addresses, hosting providers, themes, and ownership details to make them appear unrelated. Within the content published on these sites, links are strategically placed that point to the main website the owner wants to rank higher. By doing this, the owner attempts to pass link equity (also known as “link juice”) from the PBN sites to the target website.
The purpose of a PBN is to give the impression that the target website is naturally earning links from multiple independent sources. If done effectively, this can temporarily improve keyword rankings, increase organic visibility, and drive more traffic from search results.